


1. How Much Solar Power Do You Need for an RV? ☀️
Choosing the right camper solar panels depends on your daily energy consumption. The goal is to power your devices without running out of energy.
For example, a camping fridge uses about 500 to 700 Wh per day. LED lights, phone chargers, and other small devices add another 300 to 500 Wh, depending on usage.
A 200W RV solar panel kit generates around 800 to 1000 Wh per day (depending on sunlight). This is usually enough for basic needs, with some extra power for additional devices.
👉 Want to calculate your exact energy needs? Read our full guide to find the right solar power for your RV air conditioner, fridge, and other appliances! Calculate your solar battery needs 🚐⚡

2. Which Type of Camper Solar Panels Should You Choose? ☀️🚐
Choosing between monocrystalline and polycrystalline solar panels depends on your priorities. Both work well for RV solar panel installation, but each has pros and cons.
Monocrystalline Solar Panels 🚀
✅ High efficiency: 15-20% energy conversion, perfect for long trips.
✅ Great in low light: Works well even on cloudy days.
✅ Durable: Longer lifespan, more resistant to weather conditions.
⚠️ Downside: More expensive due to advanced technology.
Polycrystalline Solar Panels 🌞
✅ More affordable: Cheaper to produce, great for budget-conscious campers.
✅ Good efficiency: 13-16% energy conversion, enough for most sprinter van solar panels setups.
⚠️ Downside: Slightly lower efficiency and more sensitive to light variations.
💡 Verdict: A 200W polycrystalline panel is an excellent balance between price, power, and ease of installation for everyday use.
How Long Do RV Solar Panels Last? ⏳
The lifespan of camper solar panels varies by type but usually ranges from 20 to 25 years.
🔹 Monocrystalline panels last longer, retaining about 80% efficiency after 20 years.
🔹 Polycrystalline panels degrade slightly faster and have a slightly lower efficiency over time.
Tips to Extend Solar Panel Lifespan
✅ Keep them clean to avoid dirt buildup.
✅ Check connections & charge controller regularly.
✅ Avoid scratches and physical damage.
With proper care, your best RV solar kit will keep your adventures powered for years! 🌞♻️

3. How to Test Camper Solar Panels? ☀️🚐
To keep your camper solar panels working efficiently, check their voltage and amperage regularly.
🔹 Voltage (V): Ensures the panels generate enough power to charge your battery.
🔹 Amperage (A): Measures the flow of electricity, crucial for overall efficiency.
Pro Tip:
Use a multimeter to measure these values directly at the panel’s output terminals. This helps detect performance issues early.

Why Do You Need an RV Charge Controller? 🌞
A charge controller (see section 9) regulates voltage and current from your solar panels to protect your RV battery.
🔹 It optimizes energy flow for maximum efficiency, even in low sunlight.
🔹 It’s essential for RV solar panel installation up to 400W, preventing overcharging and extending battery life.
💡 Bottom line: A solar charge controller is a must-have for any best RV solar kit. It adjusts power output to maximize efficiency and keep your system safe.
4. How to Clean Camper Solar Panels? 🌧️
For optimal performance, clean your panels regularly. Dust, dirt, and debris can reduce efficiency over time.
Easy Cleaning Steps:
✅ Use warm soapy water and a soft sponge or non-abrasive cloth.
✅ Avoid harsh chemicals or abrasive tools to prevent surface damage.
✅ Clean them early morning or evening to avoid streaks from the sun drying the water too fast.
Keeping your sprinter van solar panels clean ensures they absorb maximum sunlight and power your RV air conditioner and camping fridges effectively.

5. How Do Camper Solar Panels Work? 🛠️
Camper solar panels capture sunlight using photovoltaic cells, converting it into DC electricity.
🔹 A charge controller regulates this energy before sending it to the battery.
🔹 The battery stores power, allowing you to run RV appliances even when the sun isn’t shining.
This setup ensures a steady power supply for essentials like camping fridges, lights, and air conditioning.
6. How to Install Solar Panels on an RV? 🚐🔧
Installing RV solar panels might seem tricky, but following these simple steps makes it easier.
4 Easy Steps for RV Solar Panel Installation
✅ Find the Best Placement:
First, choose a shadow-free area on the roof, avoiding obstructions like antennas or AC units. This maximizes sunlight exposure.
✅ Mount the Panels Securely:
Next, attach the panels firmly, angling them for optimal sunlight absorption. Follow safety guidelines to prevent roof leaks.
✅ Connect the Wiring:
Then, link the panels to the charge controller, which stabilizes the current before sending it to the battery. Ensure all connections are properly insulated.
✅ Hook Up the Battery & Test:
Finally, connect the charge controller to the battery, check everything, and run a test to confirm the system works.
💡 A Solar System for RV with Battery 400W simplifies installation and provides reliable power for your RV air conditioner, fridge, and other essentials.

7.How to Connect Camper Solar Panels? 🔌☀️
Proper installation ensures safety and efficiency. Follow these essential steps to set up your RV solar panel system correctly.
Key Steps for a Safe Connection
✅ Turn Off All Power Sources First
Before anything else, disconnect all power sources. Wear insulated gloves and work in a dry environment to avoid short circuits.
✅ Connect the Solar Panels to the Charge Controller
Next, link the solar panels to the charge controller. Always check the polarity (+ and -) and secure the connections to prevent overheating.
✅ Attach the Charge Controller to the Battery
Then, connect the charge controller to the battery. Double-check the polarities and make sure the cables are tight and secure to avoid accidental disconnections.
✅ Final System Check & Activation
Finally, inspect all connections one last time. If everything looks good, turn on the system and confirm that energy is flowing to the battery.

8. Which Battery is Best for an RV? 🚐🔋
Choosing the right battery is crucial for reliable solar power in your camper. Here’s what to consider:
Battery Capacity (Ah)
A battery’s capacity, measured in amp-hours (Ah), determines how much energy it can store. For most RV setups, a 200Ah battery is ideal, especially if you run high-power appliances like a camping fridge or air conditioner.
Types of RV Solar Batteries ⚡
🔹 Lead-Acid Batteries: These are the cheapest but also the heaviest. They have a shorter lifespan and shouldn’t be deeply discharged. Not the best option for solar setups.
🔹 Lithium-Ion Batteries: Lighter and more efficient, these batteries offer longer lifespans and deeper discharge capabilities. They are perfect for solar power but come at a high price. 💸
🔹 AGM (Absorbent Glass Mat) Batteries: A great mid-range option, AGM batteries are more durable than lead-acid, require less maintenance, and handle vibrations well.
💡Best Battery for Camper Solar Panels? Check out our full guide on choosing the best RV battery!

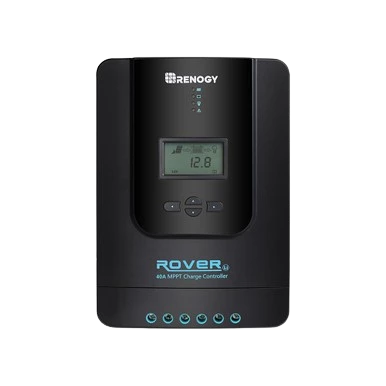
9. How to Choose a Solar Charge Controller for Your Camper?
The Role of a Charge Controller ⚡
A solar charge controller is an essential part of an RV solar panel installation. It regulates energy flow between the solar panels and the battery, preventing overcharging or excessive discharge.
It also ensures efficient energy capture and storage for future use. A high-quality controller extends battery life and boosts solar system performance 🌞.
Types of Solar Charge Controllers
There are two main types of solar charge controllers:
- ✅ PWM (Pulse Width Modulation): This option is affordable 💰 and works by adjusting the pulse width of the electricity sent to the battery to maintain a steady voltage. It’s suitable for small to mid-sized installations, but less efficient, especially in low sunlight conditions.
⚠️ Not recommended for an RV solar panel installation.
- ✅ MPPT (Maximum Power Point Tracking): A more advanced and efficient option. It continuously tracks the maximum power point of your solar panels, adjusting voltage and current for optimal energy extraction.
💡 MPPT controllers can recover up to 30% more energy, making them ideal for low-light conditions and ensuring maximum efficiency.
👍 Best choice for camper solar panels!
Why Choose an MPPT Charge Controller?
The MPPT solar charge controller is a fantastic option for RV and van solar systems. It maximizes energy yield, efficiently directing excess solar power to the battery 🔋.
✅ Ensures maximum performance ✅ Great for high-power solar systems ✅ Works efficiently even on cloudy days 🌥️
For the best solar power for camping fridges, air conditioners, and other RV appliances, an MPPT controller is the ultimate solution.
10. Portable Battery vs. Fixed Battery for Camping & RVs ⚡🚐
Which One is Right for Your rv solar panel installation ?
🔹 Mobility 🏞️: A portable battery is lightweight and easy to carry, making it perfect for outdoor activities. A fixed battery stays installed in your camper, providing stable long-term energy storage.
🔹 Charging Devices 🔌: A portable battery offers flexibility, with multiple USB, 12V, and 110V outlets to charge your gadgets. A fixed battery powers your entire RV solar system, great for long-term energy needs.
🔹 Energy Autonomy 🔋: A portable battery is ideal for short trips, while a fixed battery ensures reliable power supply for longer journeys.
Final Thoughts ✨
A portable battery is great for occasional use, while a fixed battery is best for full-time RV living.
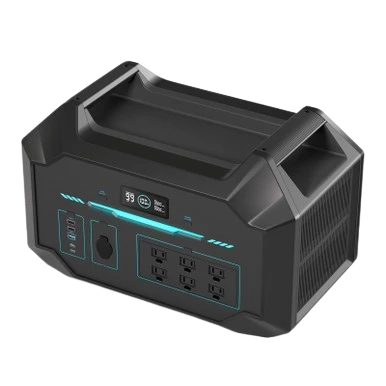
Camping Solar Portable Power Station
Conclusion: Power Your Adventures with Solar Energy! ☀️
Choosing the right solar panel system and components can transform your camping experience into a self-sufficient and comfortable adventure. Whether you go for monocrystalline or polycrystalline solar panels, an MPPT charge controller, or an AGM battery, every element plays a key role in your off-grid setup.
With these helpful tips, you’ll be ready to make the most of your RV solar power system, save energy, and protect the environment 🌿.
🚐✨ Ready to hit the road?


